- Details
- Category: Instructional Aides
When it comes to computers, I'm asked, "What should I look for when buying a computer?" My usual response is to ask, "What will you be using your computer for?" This is where things can get a little more complicated. Many times, I hear that a powerful computer isn't needed. This brings me back to the days when I built customized computers for educators. As stated, the premise was that not much was done with a computer. But then people would explain they only need a laptop for school work, including wanting to do some video editing. I would then explain when working with video, you need to keep two things in mind: first, video is the most graphic-intensive thing you could do with a computer. Secondly, video files take up much hard drive space and require enough RAM to handle video. When I would give them a quote for a computer, I would hear..." I saw a computer for x-amount; why are yours more expensive?" My next question would be what this advertised computer contains regarding motherboard, processor, video card, RAM, hard drive size, and what type of monitor. The answer usually was, "I'm not sure."
I mention all of this so you can remember the above when selecting a computer or laptop. You can view the various computers, laptops, and portable devices, knowing that if I were looking to purchase, I'd be comfortable purchasing any of these.
Desktop Computers
Laptops
Chromebooks
- Details
- Category: Instructional Aides
When it comes to technology tools for teachers, I have to admit I'm always searching for the best. For me, it is often the ones that have that WOW factor. Here are some tools you can investigate to see if they work for you. Please remember there are many more than I've listed here. As time passes, I may add more as I investigate the latest, most excellent tools.
|
Classroom Management |
 Create Presentations Create Presentations |
|
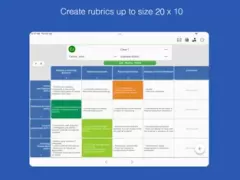
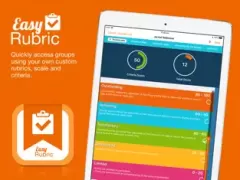
Grading Rubrics |
 Grade Slider |
 Learning Management System |
 Pre-assessment & Review |
 Remote Access & Screen Mirroring |
|
When it comes to Classroom Management tools in today's digital age, there are no magical solutions. What I find works best is tools that get students involved in their learning. When students are invested, classroom management worries seem to diminish. That isn't to say they disappear; it's more like they don't take center stage.
 |
Classcraft initially started as a classroom management tool but, since then, has added new dimensions to its offerings. You can use numerous tools, from students creating their characters to Random Events to the Timer, Volume Meter, and Quests; I've used ClassCraft since its inception. You can even have parents involved in the process. There are two versions - The Basic (Free) and the Premium ($120/year). |
 |
ClassDojo is another classroom management tool that allows teachers to record and track student behavior, facilitate classroom activities, curate student portfolios, and open a school-to-home line of communication. I would recommend this for younger students. |
 |
TeacherKit is an app available on iOS, Android, and MS Windows. You can record students' attendance, grades, and behavior, manage the class, and communicate with students and parents. It is available as a free app or Premium ($39.99/year). |
Besides Classroom Management tools, there are a number of tools available for teachers to use. If you're looking for options to create lessons or presentations for your students and are looking for tools to allow you to create these lessons, you might want to consider the following tools.
 |
30hands, you can transform your PDFs and Google Slides into captivating video presentations without any hassle. With 30hands, you can easily convert static content into dynamic visual experiences that leave a lasting impression. This program was initially released in 2012 as an iOS app. With the popularity of tools such as Google Classroom, the company closed down in 2021. It came back in 2022 when it became a web app. You can try it for free, but there are limitations, or you can purchase it for solo creators at $100/year. A team subscription costs $500/year. |
| Classkick allows teachers to upload their content or create something new with drawings, text, images, audio, links and, and videos to provide instruction or develop assignments. Students can work on their own devices either 1:1 or in a group. Students can input drawings, text, images, and audio. They can also fill in the blank or answer multiple-choice responses to their teacher's created material. Teachers can provide individualized, real-time feedback and grading. while completing lessons, students can ask their peers for help anonymously. There are two versions an individual teacher can use. The Basic version is free and allows up to 20 assignments. The Pro version costs $179.00/year or $18.99/month | |
| Explain Everything is an easy-to-use design, screencasting, and interactive whiteboard tool that lets you annotate, animate, narrate, import, and export almost anything to and from anywhere. Create slides, draw in any color, add shapes, add text, and use a laser pointer. Rotate, move, scale, copy, paste, clone, and lock any object added to the stage. There are three options: Free, which limits you to 3 projects, one slide per project, a 3-minute limit on videos, collaboration with one person (15-minute time limit), and 500 MB cloud storage; Advanced ($69.00/year) which removes all limitations, and a School version (check for pricing) | |
| Fishtree is an Adaptive learning platform designed to support a Competency-based learning model. Teachers and school administrators utilize Fishtree to automate curriculum design and management. This includes creating lessons and courses, documenting student grades, sourcing educational materials, enabling tailored learning experiences, and monitoring student progress trends. | |
 |
Flip (formerly Flipgrid) allows you to create grids of questions or topics using text or video and share your questions with whomever you like. Your audience then responds with recorded videos. Flip includes pre-existing video discussion topics from organizations including NASA, PBS, and the BBC. The platform is available via a web browser or through a mobile app. The program is free. |
| Glean allows you to assign video lessons to your students and follow their progress and viewing habits. It’s like you’re sitting with each student one-on-one. Insights turn any of the 16,000+ lessons on Glean into an assignment for your students. At the click of a button, create a private link to share with your students. You no longer have to be in the dark about your students. Insights identify your class’ engagement down to the second with a live progress bar. Know when students rewatch parts of the lesson as the layers of their progress turn green. Glen for individuals costs $129/year. | |
| GoConqr allows students and teachers to create, discover, and share learning resources. It includes study tools to create Mind Maps, Flashcards, Notes, and Quizzes. Students can plan their studies and monitor their progress in real-time. There are three plans to choose from: Basic (free), Student ($1.08/monthly paid annually), and Teacher ($1.42/monthly paid annually). | |
| Kahoot allows you to create and play quizzes, discussions, or even surveys (which they call Kahoots) using any device with a web browser. Engage the room and focus attention by projecting the quiz onto the screen at the front. Without needing an account, everyone in the room quickly joins through their device, seeing their name appear at the front. Answering questions in real-time through an easy-to-use interface, they play against each other, aiming to top the on-screen leaderboard while you facilitate and discuss the content. You can sign up for three school plans with a monthly price range from $3.99 to $12.99. | |
| Knowmia Teach is a lesson planning and recording tool for teachers and their students. It helps you create short video lessons on any subject and publish them on Knowmia.com so students, other teachers, and the public can find them. Knowmia Teach makes it easy to bring in visual aids from multiple sources, organize them in steps (like slides in a presentation), and use your voice, face, and fingers to bring your lesson to life. You can try Knowmia for free for 30 days. After the thirty days, you have two options: $19.99 per month or $199.99 billed yearly. | |
|
Nearpod allows teachers to make slides-based lessons interactive and gather data on student understanding by adding formative assessments, simulations, and dynamic media. You can create videos with built-in interactive questions to check for understanding. There is also a library of standards-aligned videos, or you can create your own. There are 3 levels of subscription: a free subscription will allow for 100 MB storage, 40 students per lesson, and Nearpod core features and functionality (Creation of interactive slides, interactive videos, and gamified activities. Premade slides-based lessons, interactive videos and gamification and activities (up to your storage limit) 3 teaching modes to support in-person, hybrid, and remote learning Real-time insights delivered through 20+ formative assessment and dynamic media features), Gold License includes 1 GB of storage and up to 75 students per lesson $159/year, and Platinum License (School License) includes unlimited storage and 250 students per lesson. |
|
| Pear Deck takes slide-based presentations into interactive experiences for students. It can be used as an add-on within Google Slides, which allows it to integrate with Google Classroom. There is a three-tier pricing structure: Basic (Free), Individual Premium ($149.99/year), and Custom (request quote) for schools and districts. | |
One of the most excellent things about having an iPad handy is when I am grading students' projects. Sometimes, I would create a museum-style project center in the library. As students displayed their projects around the library, I could walk around the library and use a rubric app to record grades and add comments on the fly.
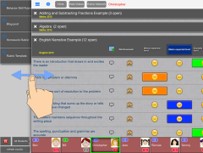
For those who have been teaching for a while, you might remember those old cardboard slide graders. Determining a grade is a little like deciding on a tip. If I want to give 20%, it's pretty easy to determine the amount. The problem is when you have an odd number, how do I determine the grade? With these handy grading apps, it make it very easy.
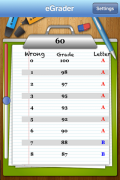 |
The eGrader App makes it easy to calculate student grades. eGrader immediately calculates the grades based on your selection and displays them in real time on a fun graphic of a classroom clipboard. The settings screen, set against a classroom chalkboard, has a number of options that allow you to customize your eGrader iPhone App. Set the grade scale range using playful, colorful slide rulers. Select the number of decimal places from 0 to 2 places. Turn the color option on or off. Sort either by correct or wrong answers or both. It is available for iPad, iPhone, Desktop, or Online versions. You can try the free trial that allows ten uses; after that, the cost is $7.95 |
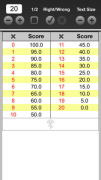 |
Easy Grade makes it easy to grade your students' papers when you don’t have the cardboard EZ Grader with you. Adjust how many questions are on the test. Choose whether you want to increment by half-points if you gave partial credit (feature available via In-App Purchase). Choose whether you want to calculate based on the number of problems correct or the number of problems wrong. Increase or decrease the text size to fit more or less on the screen. |
One of the most powerful tools available to teachers is when they put a Learning Management System (LMS) into place. LMSs take what presentation apps can do and move beyond simply offering presentations. More interactivity is built into an LMS, though how much depends on which LMS you decide to use. I'm biased in my preference for which one to use. Over the years, I've gone with Moodle. A few years back, when I was teaching a graduate-level course on web-based course development, one of the students sang the praises of Edmodo. Edmodo was so popular that a number of conferences that I attended used Edmodo for all presentations. There was an almost cult-like following when it came to Edmodo. Then Google Classroom came along, and people jumped ship regarding Edmodo and started singing the praises of Google Classroom. I've used both of these LMSs but have stuck with Moodle due to the power of what it can do. Moodle is a little like the tortoise and the hare. These other LMSs come along, and everyone races to join in using them. But there is Moodle, which is still moving along with the ability to add additional free plugins that expand what it can do. One final thing to consider is who owns the material. In most cases, Moodle is locally hosted, and therefore, the school owns the material. With Google Classroom, since it is in the cloud, you don't own the material.
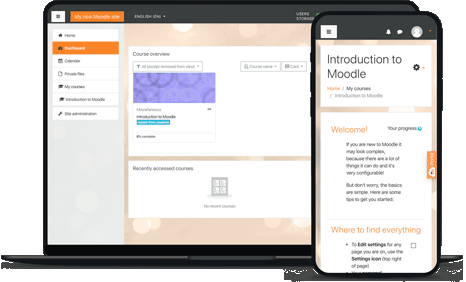 |
Moodle is a learning platform designed to provide educators, administrators, and learners with a single robust, secure, and integrated system to create personalized learning environments. With over 20 years of development guided by social constructionist pedagogy, Moodle delivers a robust set of learner-centric tools and collaborative learning environments that empower teaching and learning. There is also a mobile app available. The best part is that it's free, including most of the plugins! |
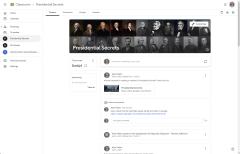 |
Google Classroom has become a very popular tool that took off, which in some ways led to Edmodo's demise. Since schools were moving towards Chromebooks and away from traditional PCs and Macs, educators were familiar with various Google apps. The good news about Google Classroom is that it seamlessly works with other apps such as ClassCraft, Epuzzle, Bookwidgets, and numerous other applications. I've used Google Classroom in conjunction with ClassCraft when I had the students complete quests within ClassCraft. I prefer Moodle because it is more interactive than Google Classroom. With the numerous plugins, I can add more interactive activities to Moodle. Google Classroom is what you see is what you get. |
There are a number of tools out there that allow teachers to utilize their computers or mobile devices to create fun interactive activities for their classrooms. Some activities allow students to use their own devices at their desks to respond to questions, quizzes, or other interactive activities.
 |
Plickers is one of my favorite tech/old-school tools to use in the classroom. Why do I call it tech/old school? Because it is a combination of the two. As the teacher, you use tech, and students use old-school cards that they hold up to answer questions. You can print out your cards or order laminated cards from Amazon for $19.99.I choose to order the laminated cards so I can use them repeatedly. Another great thing about Plickers was before using it, my school had one set of slammers that teachers would try to reserve and then scramble to see who was hiding them away in their classroom. You can use three versions: a free version and a paid version, which offers more options at $5.99 per month if you purchase a yearly account or $8.99 per month if you pay monthly. |
 |
Bookwidgets is a powerful widget builder that lets you create rich, interactive widgets that you can drop right into your Google Classroom, Microsoft Teams for Education, Moodle, Canvas, itslearning, or Schoology. BookWidgets empowers teachers to set up tailored exercises that can be automatically graded and distributed to students with a click. The activities you create with BookWidgets work equally well on Chromebook, PC, and Android tablets. All you need is a web browser. The cost for individual teachers is $9.95/month or $55/year. Teacher Group - 5 teachers is $55/year, and 10+ teachers is $39.50/year. |
 |
Quizlet is a study aid in app form. In essence, it's a flashcard app with smart features and it can handle images, diagrams, various languages, and even audio uploads, so it's ideal for self-paced learning and studying. You can make your own flash-card study sets, get access to study sets created by instructors, or browse for sets created by other users. It has built-in adaptive learning, meaning it pays attention to the questions you get right and wrong and makes sure you work on the most difficult material. There is a free version, or you can subscribe to Quizlet Plus for $35.99 per year. |
 |
Quizizz is a learning platform where teachers can create lessons, conduct formative assessments, assign homework, and interact with students. The teacher controls the pace as the class goes through each question together. You can also create student-paced lessons/quizzes in which you can see a leaderboard and live results for each question or lesson. Prebuilt quizzes are also available for use. An individual plan costs $12/month, billed annually at $144/year. |
Do you ever feel like you are chained to your computer? Your computer may be connected to a whiteboard in front of your classroom or sitting on your desk. As you're explaining a lesson to your students, you have no idea whether students understand or are following along. With remote access software, you can free yourself from being stuck in one place and unable to move about the classroom freely.
| Airparrot 3 lets you wirelessly mirror your screen or stream media files to various receivers. In my case, I had upgraded my Apple TV device at home and brought my old one into class. I hooked it up to the whiteboard and projector unit in the front of my classroom. Later, I purchased Reflector 4 (see below) and used that instead to mirror my screen. With iOS Air Parrot, I could walk around the classroom and control my computer through my iPad.Air Parrot Remote (iOS version) costs $7.99. AirParrot 3 for Education costs $17.99. Not sure if it will work for you? You can download and try it for free before you buy. | |
| Reflector 4 allows you to mirror your device to your computer. So, I can take what I have on my iPhone or iPad and display it on my desktop computer with a larger monitor. I can mirror multiple devices at one time. I can also use it to record anything I'm doing on my device. This is especially handy when creating demos, walkthroughs, or tutorials, which I will share with students or other educators. Since I'm constantly introducing new technology, it makes it easy to show how to do something on a device. For example, if I want to show students how to use the Moodle App for their iPhones, I can easily record it and post the how-to on my website.I can download and try the program for free, and if it works for me, I can purchase it for $19.99. | |
| Splashtop Classroom allows you to share your screen with devices. Students can participate in lessons on their own devices. Once connected, students can view, control, and annotate lesson content directly on their devices. There are three options to subscribe: Classroom Basic ($29.99/year per teacher) allows three students to connect at a time, Classroom Plus ($99.99/year per teacher) allows up to 40 students to connect at a time, and On-Premise ($99.99/year per teacher) allows schools to deploy Splashtop Center to be hosted on their internal server. |
- Details
- Category: Instructional Aides
Digital Educational Resources & APPs: Find Items for Education - All Subject Areas

| Arts & Music | Classroom Management & Teacher Tools | Computers | Cross Curriculum |
 |
 |
 |
 |
| History & Social Studies | Language Arts | Math | Science |
 |
 |
 |
 |
| Student Tools | |||
 |
|||
- Details
- Category: Instructional Aides
Books for Educators - Browse for Yourself

Technology Integration:


Google Apps:


Google Classroom:

Microsoft Office:

Tools for Creating Online Tutorials & Guides:

- Details
- Category: Instructional Aides
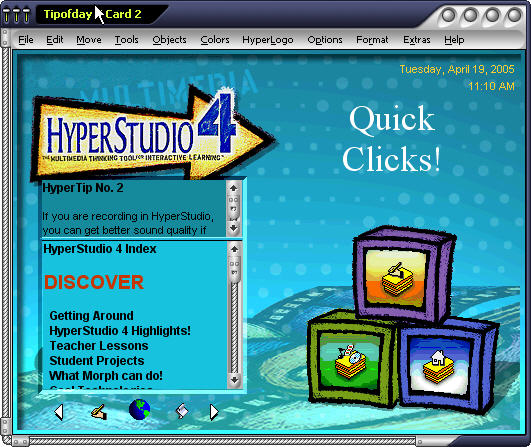 Opening Screen For HyperStudio 4
 Creating a New Stack Creating a New Stack |
Getting Started 1. Open up HyperStudio and click on New Stack |
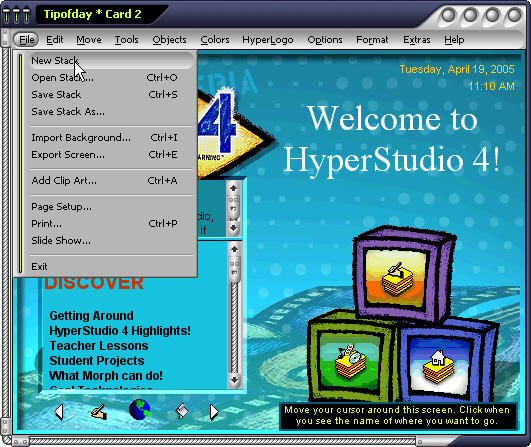
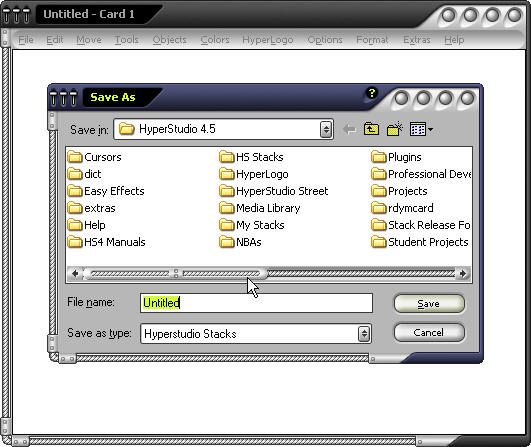 Save Your Stack Save Your Stack |
2. Click on File and select Save Stack. 3. Give your stack a name and save it into HyperStudio Folder. |
|
|
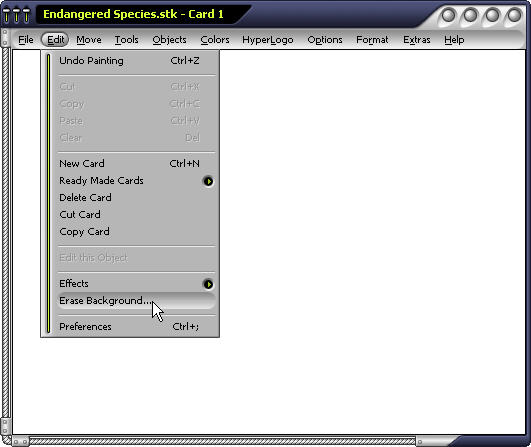
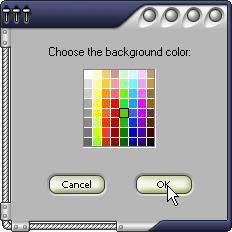
Adding Background and a New Card: 4. Click on Edit Menu and choose Erase Background. 5. Select a color for your background and click OK. |
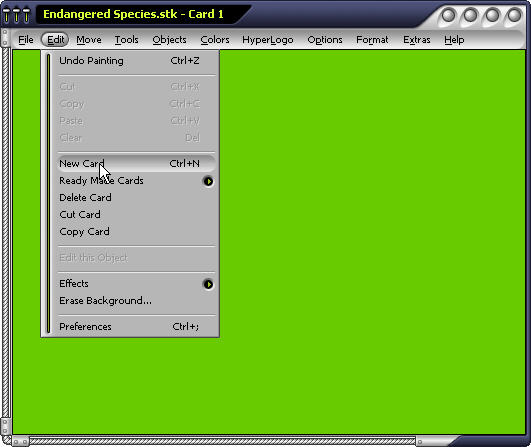 Add a New Card Add a New Card |
6. Click on Edit and choose New Card. 7. Select a color for your background and click OK. |
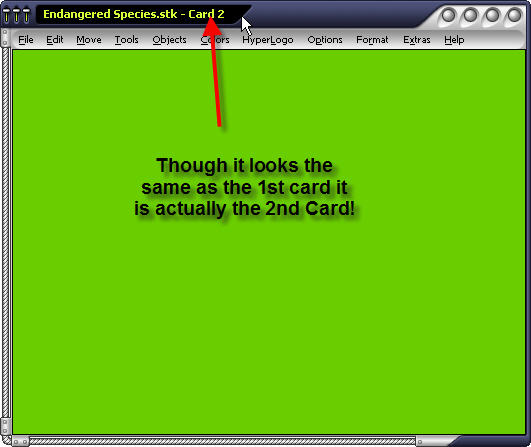 Though it looks like Card 1, it is Card 2 Though it looks like Card 1, it is Card 2 |
|
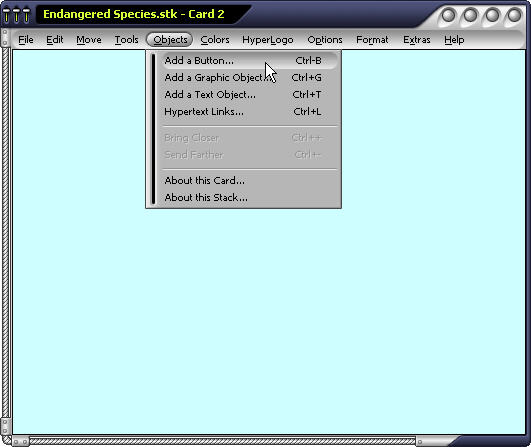 Add a Button Add a Button |
Adding a Button: 8. Click on the Objects Menu and choose Add A Button. 9. Under Type select the top right button. 10. Next to Name type Go Back. |
|
11. Click on Show Icon and select hand pointing towards the left and then click on OK. 12. Choose a color for your Name and a color for your background and then click OK 13. Click OK again. |
|
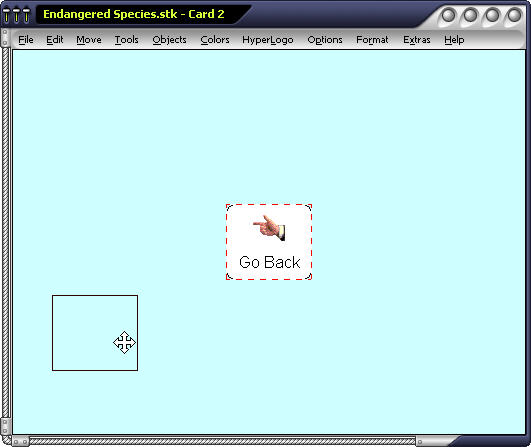 Drag the Button to the Corner Drag the Button to the Corner |
14. Place your pointer in the middle of the box and while holding the mouse button down, drag the button to the bottom left hand corner. 15. Click outside of the button. 16. Under Places to Go select Previous card. 17. In the Transitions box choose Rain and then click OK and then Done. |
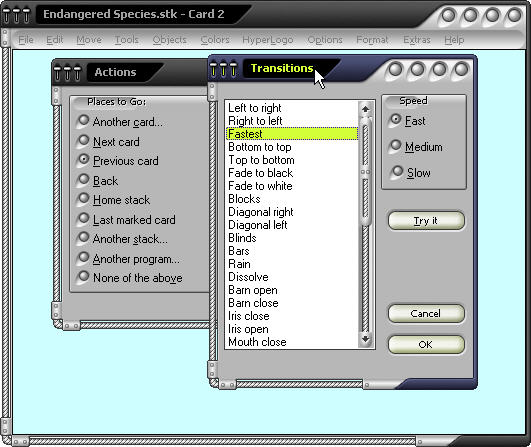 Set the Action of the Button Set the Action of the Button |
18. Test your button by clicking on it. Once at card 1 click on the Objects Menu and choose Add A Button. 19. Under Type select the top right button. 20. Next to Name type Go Forward. 21. Click on Show Icon and select hand pointing towards the right and then click on OK. 22. Choose a color for your Name and a color for your background and then click OK. 23. Click OK again. 24. Place your pointer in the middle of the box and while holding the mouse button down, drag the button to the bottom right hand corner. 25. Click outside of the button. 26. Under Places to Go select Next card. 27. In the Transitions box choose Barn Open and then click OK and then Done. 28. Test your button by clicking on it. 29. Return to Card One. |
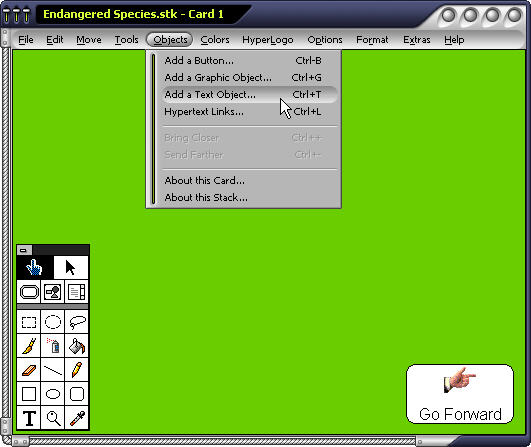 Add a Text Object Add a Text Object |
Adding a Text Object: 30. Click on Objects Menu and select Add a Text Object and click OK. 31. Drag the box to the top middle part of the screen. 32. Move your mouse to the bottom part of the box and when your pointer has arrows up and down hold the mouse button down and drag the box up towards the top of the screen so that the box is about 1" wide. 33. Move your mouse to the left side of the box until the mouse has arrows pointing left and right and holding the mouse button down drag it towards the edge of the card. Do the same for the right side of the box. 34. Click outside of the box. |
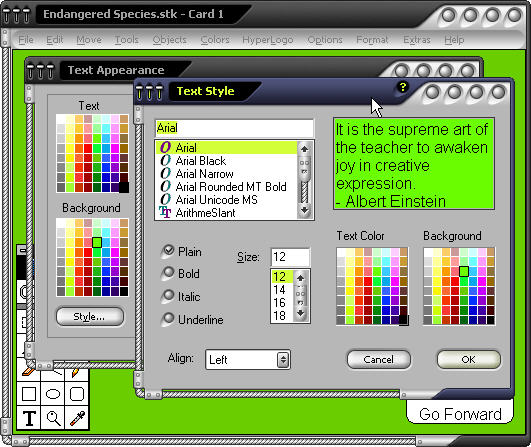 Setting the text color and style. Setting the text color and style. |
35. Select a color for your text and a color for the background that matches the color of Card 1. 36. Click on Draw scroll bar, scrollable, and draw frame so that an X does not appear in the box. 37. Click on Style 38. Click on Bold, Outline' and Shadow so that a X appears in the box next to the words. 39. Select 24 For the Size. 40. Click on Left (next to the word Align) and holding the mouse button down select Center. 41. Click OK and then OK again. |
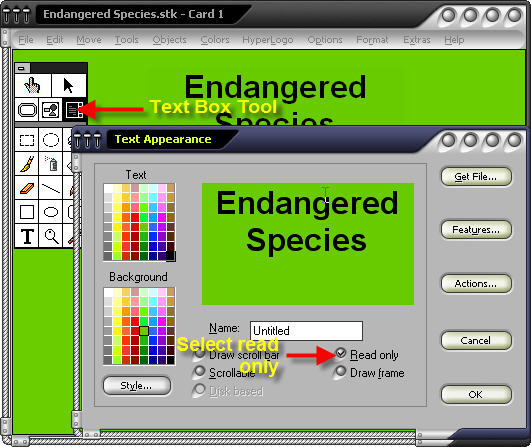 Set text to read-only. Set text to read-only. |
42. You should now see a blinking cursor in the top middle section of you card. Type HyperStudio Project 43. Click on the Tools Menu and while holding your mouse down, drag the Tool Box down to the left side of your screen. 44. Click on the Text Box tool (the one with a T inside of the box). 45. Double click on your headline and click in the box next the words Read Only and then click OK. |
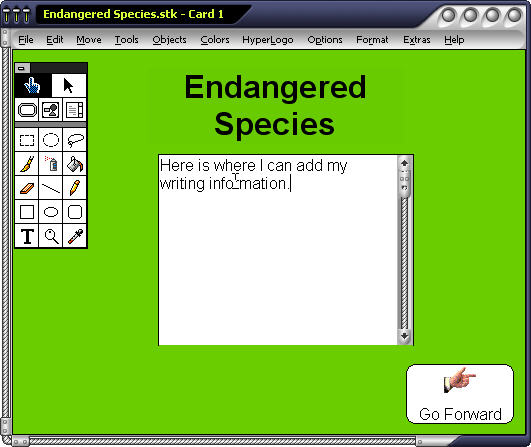 Adding a plain text box. Adding a plain text box. |
46. Select the Hand Tool and you will see that you can no longer type in the box. 47. Click on Objects and choose Add a Text Object. 48. Click outside of the box. 49. Go to Styles and click on Plain and select 12 for the size. Make sure Align shows Left. Click OK. 50. Select White as your Background Color and click OK 51. Type‑ See what I can do with HyperStudio, 52. Make this Text Box so no one can write in it. |
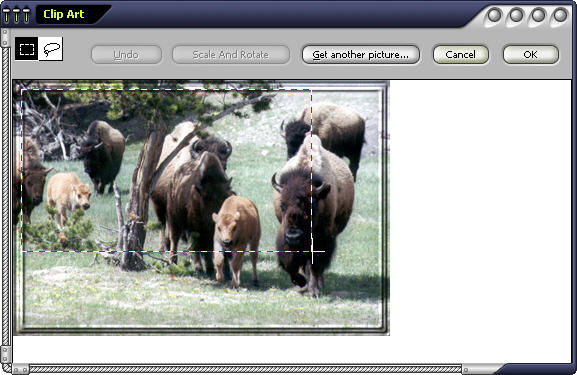
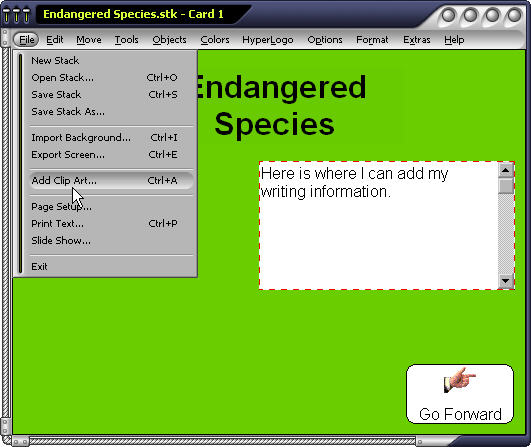 Add clip art. Add clip art. |
Add Clip Art: 53. Go to File and choose Add Clip Art. 54. Scroll down to Computer 1 and click on it and then click Open |
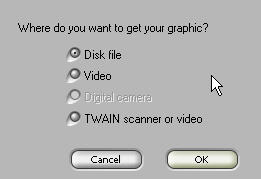 Add clip art from the disk (hard drive). Add clip art from the disk (hard drive). |
55. Using the square box (already selected hold the mouse button down and select the woman at the computer. Starting at the upper left hand corner of picture drag mouse down to the lower right hand corner past the woman. Marching ants should appear around the woman at the computer. 56. Click OK. 57. Click inside the picture and while holding the mouse down move it to the left and in the middle of the card. The Text Box should be covering part of the picture. 58. Click on the Edit Menu and choose Effects ‑ Scale and Rotate. In the Scale actor box type 50 and then click OK. Click outside of the picture. 59. Click on the Objects Menu and choose Add A Graphic Object 60. Select Addy and click Open. 61. Using the Lasso tool select a picture of Addy by holding the mouse button down while you draw a circle around Addy. The dog should have ants marching around it. Click OK. 62. Drag the dog to the right of your Text Box. Click outside of the dog. |
 Dragging to select the picture. Dragging to select the picture. |
55. Using the square box (already selected hold the mouse button down and select the woman at the computer. Starting at the upper left-hand corner of the picture drag the mouse down to the lower right-hand corner past the woman. Marching ants should appear around the woman at the computer. 56. Click OK. 57. Click inside the picture and while holding the mouse down move it to the left and in the middle of the card. The Text Box should be covering part of the picture. |
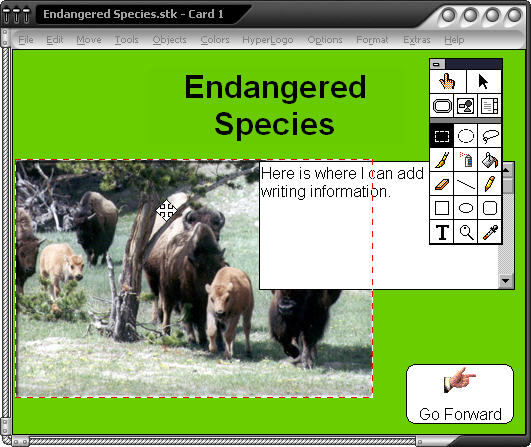 Placing the picture on the card. Placing the picture on the card. |
|
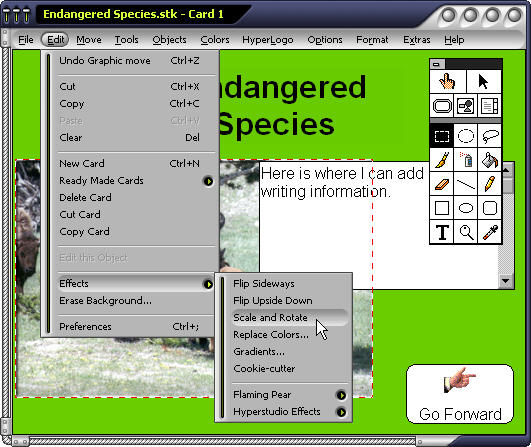 Resizing the Picture Resizing the Picture |
58. Click on the Edit Menu and choose Effects ‑ Scale and Rotate. In the Scale actor box type 50 and then click OK. Click outside of the picture. 59. Click on the Objects Menu and choose Add A Graphic Object 60. Select Addy and click Open. 61. Using the Lasso tool select a picture of Addy by holding the mouse button down while you draw a circle around Addy. The dog should have ants marching around it. Click OK. 62. Drag the dog to the right of your Text Box. Click outside of the dog. |
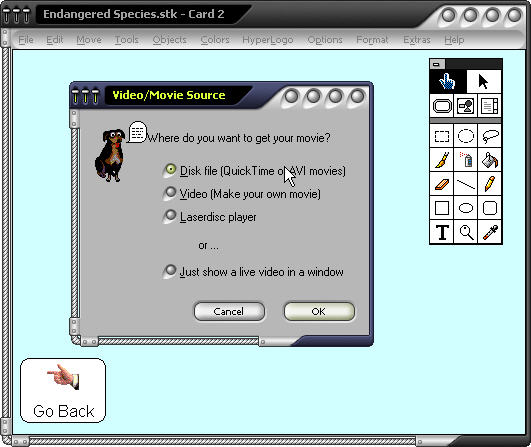 Adding a video clip, Adding a video clip, |
Add a movie clip: 63. Click on the Objects Menu and choose Add A Button. 64. Under Type select the one with the marching ants(lnvisible button). 65. Make sure the Show Name and Highlight buttons are not marked. 66. Click on Show icon and select little apple film strip and then click on OK 67. Place your pointer in the middle of the box and while holding the mouse button down, drag the button to the middle of your screen. 68. Click outside of the button. 69. Under Things to Do, select Play a movie or video. 70. Click OK. 71. Select Saturn Movie, make sure the Show Preview box has a X in it , and then select Open. |
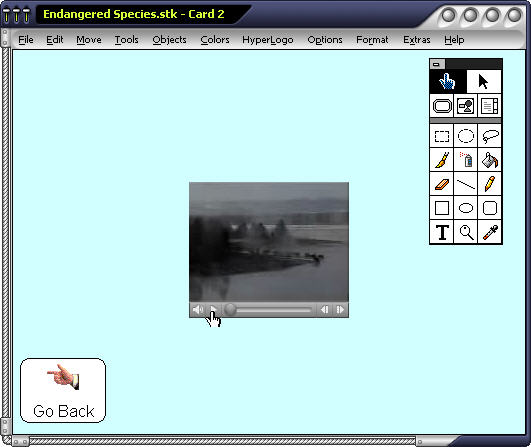 Playing your video. Playing your video. |
72. The movie should now appear on your card. Click outside of the movie. 73. Click on box next to Show first frame and then click OK and then click Done. 74. Click on the little filmstrip and test out your movie! |
 C
C